Friday, December 30, 2011

Why I Cook?

Cooking for me is less about the need and more about the want. As much as it's focused around the food my goal is to keep a tradition alive. One that is focused around connection. Keeping alive the tradition that a meal - whether its bowls filled with soup or an Easter feast - is more than just eating. Food is simply the tool to bring us together to grow closer as family and friends and just be in the moment.

This started with my grandparents and was passed down to my parents and now to a bunch of cousins who know how to cook a great meal. Although we're busy with our everyday lives, and some of us live far away, we keep the tradition alive. There are texts of meals cooked, conversations around new restaurants and if given the choice our next meal would all be together.


Our goal is to remember our grandparents - one who's been gone for quite some time and our Yiaya that recently left. And to pass on the importance of family and connection through a simple meal.
It's making sure to slow down, sit with your loved ones and enjoy every moment - no matter what that meal might be.

Wednesday, December 21, 2011

An Oldie but a Goodie - and It's Chocolate

I have standard cookie recipes that I use time and time again because they are easy, fail-proof and really just taste so darn good. Chocolate crinkle cookies are one of these little gems that I bake every holiday season and seem to be a staple at many cookie swaps over the years. They are full of chocolate, look like they are topped with snow and moist and delicious inside.

Although you have to freeze the dough for at least an hour, I enjoy the idea of breaking up the baking process. (Allows me to throw in another last minute recipe like muffins while I'm waiting!) And although there are many variations and recipes, I always go with one that includes cocoa powder. I find the flavor to be more true chocolate than using semisweet chips. Don't these look like heaven???


Chocolate Crinkles - adopted from Good Housekeeping Cookies
Ingredients
1 1/4 cups all-purpose flour
1/2 cup unsweetened cocoa (I used Hershey's special dark)
1 tsp baking soda
1/2 tsp baking powder
1/4 tsp salt
1/2 cup butter (at room temperature)
1 1/4 cups sugar
2 Tbsp light corn syrup - I simply omitted this
2 oz unsweetened chocolate, melted and cooled
2 large eggs (at room temperature)
2  tsp vanilla
1/2 cup powdered sugar

Directions
Stir together flour, cocoa, baking soda, baking powder and salt

In another bowl beat butter, sugar, corn syrup on medium speed until well combined. Add the flour mixture in batches and mix until combined. Cover dough and refrigerate at least 1 hour

Preheat oven to 350 F

Place powdered sugar in small bowl. Shape cookies into 1 inch balls and roll in powdered sugar
Place cookies on ungreased cookie sheet and bake about 8 minutes or until cookies are set.
Cool on a wire rack

Yum Yum or as my niece says Mum Mum!

Sunday, December 18, 2011

Chocolate + Espresso = Cookie Heaven

If I could be any type of angel, I'd choose to be a "cookie angel." Luckily, I was granted that wish a week ago and the results were....well, delicious!

During my stint as an angel I wanted to try something new and something chocolatey. However, I was short on time and really not looking for something too difficult. Yet again, Giada came to the rescue with her Double Chocolate & Espresso Cookies. (Trust me, creating a login for her site is WORTH it!)
How cute and chocolatey are these cookies!
I love when recipes call for chocolate and any type of coffee ingredient. Many times it's not to create a coffee flavor, but simply to enhance the chocolate taste - and who doesn't want that. These cookies were that much better since they used chocolate covered espresso beans and had a mild coffee undertone. Not to mention they were extremely simple and quick to make. Check out the recipe here!

And now for the "Good Cookie" winner - Maggie from "Kitchen Coo" - thanks to everyone who participated to support this great cause!

I think we'll extend cookie as I've got some more yummy recipes to share!

Sunday, December 11, 2011

A Cookie Giveaway (quick run)!!!

It's a first here on Food Beautiful but to keep the cookie baking coming this week we have our first giveaway (yeah!). And what's better than that??? The fact that this giveaway is to drive awareness for OXO's Cookies for Kids' Cancer Program.

It's cookie week here and to support all your holiday baking OXO has given me a "Good Cookie" spatula to test out and one to give away to a lucky winner. I love things that are cute and for a cause! The spatula is perfect for lifting those hot cookies off the tray onto a cooling rack. I also like to leave it on my counter so people think I've been baking all day...feel free to steal that trick.

Cute, right? Now let's talk about the amazing cause. Cookies for Kids' Cancer was born to help fight pediatric cancer through local bake sales. This year OXO will donate up to $100,000 to support research for new therapies - THANK YOU OXO. Visit www.oxogoodcookies.com to share some virtual cookies, find out how to host a bake sale or to find a retailer for the "Good Cookie" spatulas.

Don't you think this little tool could help you whip up one of these beauties???

HOW TO ENTER:
Simply leave a comment on this post with your favorite childhood cookie. I'll pick a winner on Thursday - and actually try to recreate that cookie recipe this weekend.

And for an extra entry, simply follow @foodbeautyful and RT the following to pass on awareness for this great cause. "RT Support Cookies' for Kids and enter the @foodbeautyful Giveaway http://bit.ly/ulsjwX"

Good Luck to All!!!

And if you don't win, definitely purchase one for yourself and a couple as gifts on Amazon - remember 50% of the profits benefit pediatric cancer awareness!

Special Delivery: Cookies!

It's the start of cookie week here on Food Beautiful - who's excited??!!

I may now love cookies more than ever - especially when they are mailed to you from a secret cookie baker! These past couple of weeks I (along with many other great food bloggers) have been busy participating in the Great Food Blogger Cookie Swap.
Sign up to participate next year!
Started on a premise from Love & Olive Oil and The Little Kitchen, the idea was to spread a little holiday cookie cheer throughout the blogger world. And boy did it spread! Each participant was given three bloggers' names and was charged with baking and sending a dozen cookies to each. And in return??? Three secret bloggers would send you some delicious creations of their own. Why didn't anyone start this idea sooner!

After much deliberation I went with a not-so-classic holiday cookie, but one that I thought would be easy to make and easy to transport. Giada De Laurentiis' Lemon Ricotta Cookies (recipe below) was the base of the idea and then I got a little creative. Half of the cookies I kept to the recipe and added lemon glaze, but since I'm a chocolate lover at heart, the other half received a dip in chocolate ganache (yum!). It's a little fun play on the traditional black and white cookies when all packed up.
yuummmm pretty cookies!
The other important part of the challenge was packing and transporting. After many years of sending cookies I've found that some general rules apply:
  • if cookies break easily on their own, they might not be the best for shipping
  • pack cookies individually (or a couple together) to ensure they last longer and have less chance of breaking
  • seal the cookies in a bag, even if using a tin or tupperware to transport
  • assume they are all going to break so provide extra packing protection
  • try to ship so they will arrive at their destination within 3 days
I packed a lemon and chocolate cookie in small cellophane bags with a twist tie. Then I placed each of these yummy bundles in a fancy take-out container (found at most craft stores) filled with green shredded paper. This was then packaged in a box and off they went!

Just think over 22,000 cookies were traveling around with this swap - how happy that makes me. And a special thanks to my secret cookie bakers below! Would love to have the recipes for all 3 of these wonderful cookies:


  • Chocolate Coconut Cookies from A Chronic Venture...as a lover of coconut I enjoyed the balance of chocolate and sweet coconut these bundles provided
  • Greek Almond Anise Cookies from The Corner Kitchen...these were perfect childhood favorites that after a long week at work reminded me of home
  • Chocolate Mint Cookies from Table for Two...classic turned up - these had a bold chocolate flavor with green mint chips, definite yum
Here's the recipe for the ones I made!

Lemon Ricotta Cookies adopted from Giada De Laurentiis
Ingredients
Cookies
2 1/2 cups all-purpose flour
1 teaspoon baking powder
1 teaspoon salt
1 stick unsalted butter, softened
2 cups sugar
2 eggs (at room temp)
1 (15-ounce) container whole milk ricotta cheese (at room temp)
3 tablespoons lemon juice
1 lemon, zested

Glaze
1 1/2 cups powdered sugar
3 tablespoons lemon juice
1 lemon, zested

Ganache
4oz chocolate (I used bittersweet)
1/3 cup heavy cream

Directions
Preheat the oven to 375 degrees F.

For the Cookies
In a medium bowl combine the flour, baking powder, and salt.
In a large bowl combine the butter and the sugar. Using an electric mixer beat the butter and sugar until light and fluffy, about 3 minutes. Add the eggs, 1 at a time, beating until incorporated. Add the ricotta cheese, lemon juice, and lemon zest. Beat to combine. Stir in the dry ingredients.

Line 2 baking sheets with parchment paper. Spoon the dough (about 2 tablespoons for each cookie) onto the baking sheets. Bake for 15 minutes, until slightly golden at the edges. Remove from the oven and let the cookies rest on the baking sheet for 20 minutes.

For the Glaze
Combine the powdered sugar, lemon juice, and lemon zest in a small bowl and stir until smooth. Spoon about 1/2-teaspoon onto each cookie and use the back of the spoon to gently spread. Let the glaze harden for about 2 hours.

For the Ganache
Place a bowl over a saucepan of slight simmering water (only about 1 inch deep). Make sure the bowl isn't touching the water. Add the chocolate and cream and stir until the chocolate is melted and shiny. Remove bowl from pan and dip half of each cookie into the chocolate. Let the ganache harden for a couple of hours.
cookie heaven!


Wednesday, December 7, 2011

Easy Cheesy Pasta Pleasey

Well isn't that a fun title :) It's the little things that amuse me.

I'm dying to tell you all about some secret cookies, but I'm sworn to secrecy until next week!!! Trust me, it's worth the wait.

In the meantime, I give you an easy pasta dish that is reminiscent of Italy but oh so easy for a weeknight treat. With few ingredients (those that I normally have on hand) this pasta is for pepper lovers who adore dishes that feel indulgent but can really become a weekly staple.

Fusilli with Pecorino Romano and Black Pepper courtesy of Giada De Laurentiis uses a handful of ingredients that really come together to make a comforting yet light pasta dish. This dish is definitely for black pepper lovers, but if you're like me you'll savor every bite. And I love the addition of spinach and lemon to freshen up the recipe. Love, love, love this simple yet satisfying dish!
I think I want to eat this every night!


Fusilli with Pecorino Romano and Black Pepper -  Giada De Laurentiis

Ingredients

Kosher salt
1 pound fusilli pasta

1/4 cup olive oil

2 cloves garlic, lightly crushed
5 cups baby spinach leaves (5 ounces)
Freshly ground pepper
1 1/2 cups grated Pecorino Romano cheese (6 ounces)
1 cup mascarpone cheese (8 ounces), at room temperature

Directions

Cook pasta, stirring occasionally, until tender but still firm to the bite, 8 to 10 minutes. Reserve 3/4 cup of the cooking liquid, then drain the pasta. 

Meanwhile, heat the olive oil in a large, high-sided skillet over medium heat. Add the garlic and cook until lightly browned, about 2 minutes. Remove the garlic and discard. Add the spinach and 2 teaspoons pepper, and cook until the spinach has wilted, about 1 minute. 

Remove the skillet from the heat and add the pasta. Add the Pecorino Romano cheese and 2 teaspoons each salt and pepper, and toss until coated. 

In a medium bowl, whisk together the reserved cooking liquid and the mascarpone cheese until smooth. Pour over the pasta and toss until coated. Season with salt.

Sunday, December 4, 2011

Guest Post for the Fishes

This one is for my love of fish (especially oysters)! A couple of weeks ago I was lucky enough to attend the Culinary Guild of New England's (CGNE) Feast of the Seven Fishes. A mixture of great wine, fresh fish and the wonderful Chef Jeremy Sewall of ICOB. It was pretty much a perfect night of tasting, learning and pure enjoyment.

Quick go over and read the write-up on how to create your own Feast of the Seven Fishes this holiday season along with some great seafood tips from Chef Sewall.


Sunday, November 27, 2011

It is that Good

I love being surprised and shocked by a restaurant meal. And I love it even more when that meal is an impromptu double date with good friends.

This past weekend we randomly called up some friends and met at Tosca in Hingham for dinner. With great reviews and a "Best of South Shore" rating we knew it would at least be a well-deserved night out. I'm always very skeptical of those restaurants that get great reviews, finding that the food is second thought to everything else happening in the restaurant. However, Tosca has changed my mind. It fulfilled my need for a city dinner close to home.
Image from Tosca

I love how when we first entered Tosca, Chef Brian Hennebury greeted us at the door. No this isn't his usual position, but chefs that come out of the kitchen to check things out put a smile on my face. We ordered a bottle of wine (holy deliciousness) and took in the rustic dining room that was neither a scene nor an event. It was just a cozy, "feels-like-home" type of place. And then we ate..and I then fell in love with the South Shore.

Tosca offers northern-Italian inspired cuisine with New England's local flavors and ingredients - you know me and local ingredients, big fan. But the food was right, really right. There were dishes that took a risk (Wild Boar Bolognese) and classics that were just done right (Angus Sirloin Medallions) all that made me realize, this is what dinner should be. Silky textures, rustic vegetables, rich meat and delicate pasta.
Image from Tosca

There was lots of sharing and tasting and an overall amazement and sentiment shared amongst the table - Tosca really is "that good". And we moved on to dessert. Something that I've told you before is not high on my restaurant love list. Until I tried Chef Kristin Beaupre's ricotta creme brulee. I don't even like creme brulee and two days later here I am dreaming about this dessert. For a chocolate lover to say this about a non-chocolate treat is rare, but it tells you something. The creamy texture, sweetened cheese and caramelized torched top came together to create a perfect surprise for my tastebuds.

I rarely rave about restaurants as a whole. I tend to love a concept, a dish, a chef - but when they all come together, it's truly worth writing about!


Wednesday, November 23, 2011

Savor those Sides

It's less than 24 hours and counting to the most wonderful, delicious holiday of the year. Whether traditional, modern or a little bit of both you're guaranteed to have some happy tastebuds by tomorrow night. Now I know this holiday focuses around the one and only turkey, but I'm a side girl myself that truly believes each appetizer, each side and each dessert deserve a prominent spot on your plate.

Having hosted "Friends Thanksgiving" for a group of 18 two weeks ago, here are my list of savory additions and the tips that help them take center stage.


Gravy - you must, must, must make your own with homemade chicken stock. Now, this doesn't mean it must be your homemade stock - I'm a fan and a purchaser of buying homemade stock. For those of you who have one oven and a tiny kitchen (that's me!), don't be afraid to pre-make the gravy and save the stress for the bird.


Potatoes - go modern classic here with garlic mashed potatoes. I always gently heat my cream/milk and throw in some whole garlic cloves to up the ante. Also, this side really comes out better when made right as the turkey is cooling down. I love fluffly mashed potatoes - they make my world happier.

Stuffing - I've been perfecting this side for the past couple of years and I think my favorite is sage with caramelized onion stuffing. This side is the perfect palette to go with what you love - try sausage and dried fruits, new breads and various spices. Just remember to use day old bread and feel free to make this one in advance.

Veggie - you can go with green beans for classic or brussel sprouts for a more adventurous crowd. However I think the key here is to make these greens stand out. Try them wrapped with prosciutto or topped homemade toasted breadcrumbs and Parmesan. Have a little fun here!

Dessert - Do what you know and love. Remember those carrot cupcakes, they're back for Thanksgiving!

Whatever you choose, take each step in stride, take help where you can and just enjoy your time in the kitchen and around the table. Happy Thanksgiving all!

Thursday, November 3, 2011

Things I DON'T Cook

I can't make coffee...this is a fact. I tried yet again today and it was a failed operation. I'm not embarrassed by this, I don't think I'll try over and over to get it right because I believe there are certain little treats you should let the experts handle. My partner-in-crime makes great coffee, the bakery down the road creates great iced coffee and I love finding new coffee geniuses -  and I'm okay with this

This is my little indulgence that I'll let others manage...only took 10 years to come to that conclusion!

Wednesday, October 26, 2011

It's Cupcake Season

As many of you know I'm not a through and through cupcake lover. It's not that I don't love the way these little packages bring joy and sweet to everyone, it's just that most times they don't taste phenomenal. And I think all desserts should be phenomenal!

However, I think I may have been converted - from a cupcake enjoyer to a cupcake lover. That is of course if I'm eating a little package of joy created from one of Joanne Chang's recipes. Her cupcakes are the perfect balance of sweet and indulgent without being over-indexed with sugar and butter, which is where I find my dislike for many cake treats.

My partner-in-crime requested carrot cake cupcakes to celebrate his birthday and I knew exactly where to turn to create the perfect ones. Joanne Chang's Flour Cookbook, where she let's you inside the world of Flour Bakery and the amazing treats that make this one of best places in Boston (yes, I think this is the truth!).

Adapted from "Flour" by Joanne Chang and Christie Matheson

Ingredients

Carrot Cake Cupcakes
2 eggs
1 cup (220 grams) packed light brown sugar
3/4 cup (150 grams) canola oil
3 tablespoons nonfat buttermilk
1/2 teaspoon vanilla extract
1 cup plus 2 tablespoons (160 grams) unbleached all-purpose flour
1/2 teaspoon baking powder
1/2 teaspoon baking soda
1/2 teaspoon ground cinnamon
1/4 teaspoon ground ginger
2 cups (260 grams) tightly packed shredded carrots
1/2 cup (80 grams) raisins
1/2 cup (50 grams) walnuts, toasted and chopped

Cream Cheese Frosting
12 ounces (340 grams) cream cheese, left at room temperature for 4 hours
1/2 cup (1 stick/114 grams) unsalted butter, at room temperature
1 2/3 cups (230 grams) confectioners' sugar

Directions
Carrot Cake Cupcakes
Position a rack in the center of the oven, and heat the oven to 350 degrees. Line a standard 12-cup muffin tin with paper liners.

Using a stand mixer fitted with the whip attachment (or a handheld mixer), beat together the eggs and brown sugar on medium-high speed for 3–4 minutes, or until the mixture is light and thick. (This step will take 8–10 minutes if using a handheld mixer.) In a small bowl or pitcher, whisk together the oil, buttermilk, and vanilla. On low speed, slowly pour the oil mixture into the egg-sugar mixture. This should take about 30 seconds.

In a small bowl, sift together the flour, baking powder, baking soda, salt, cinnamon, and ginger. Using a rubber spatula, fold the flour mixture into the egg-sugar mixture. When most of the flour mixture has been incorporated, add the carrots, raisins, and walnuts and continue to fold until the batter is homogenous. Divide evenly among the prepared muffin cups.


Bake the cake flour for about 1 hour and 20 minutes (or the cupcakes for about 50 minutes), or until the top is golden brown and springs back when pressed in the middle with a fingertip. Let cool completley in the pan on a wire rack.


Cream Cheese Frosting
While the cake is baking, put the cream cheese in the stand mixer fitted with the paddle attachment, and beat on medium speed for about 1 minute, or until smooth. If you have forgotten to take the cream cheese out of the refrigerator 4 hours in advance, you can softren it in a microwave on medium power for 30 seconds. Add the butter and continue to beat for another 1 minute. Scrape the sides and bottom of the bowl and add the confectioners' sugar. Beat for 1 more minute, or until well mixed. You should have about 3 1/2 cups.

Cover the frosting and refrigerate for 2–3 hours before using to allow it firm up enough to pipe and spread. (The frosting can be made up to 5 days in advance and stored in an airtight container in the refrigerator.)

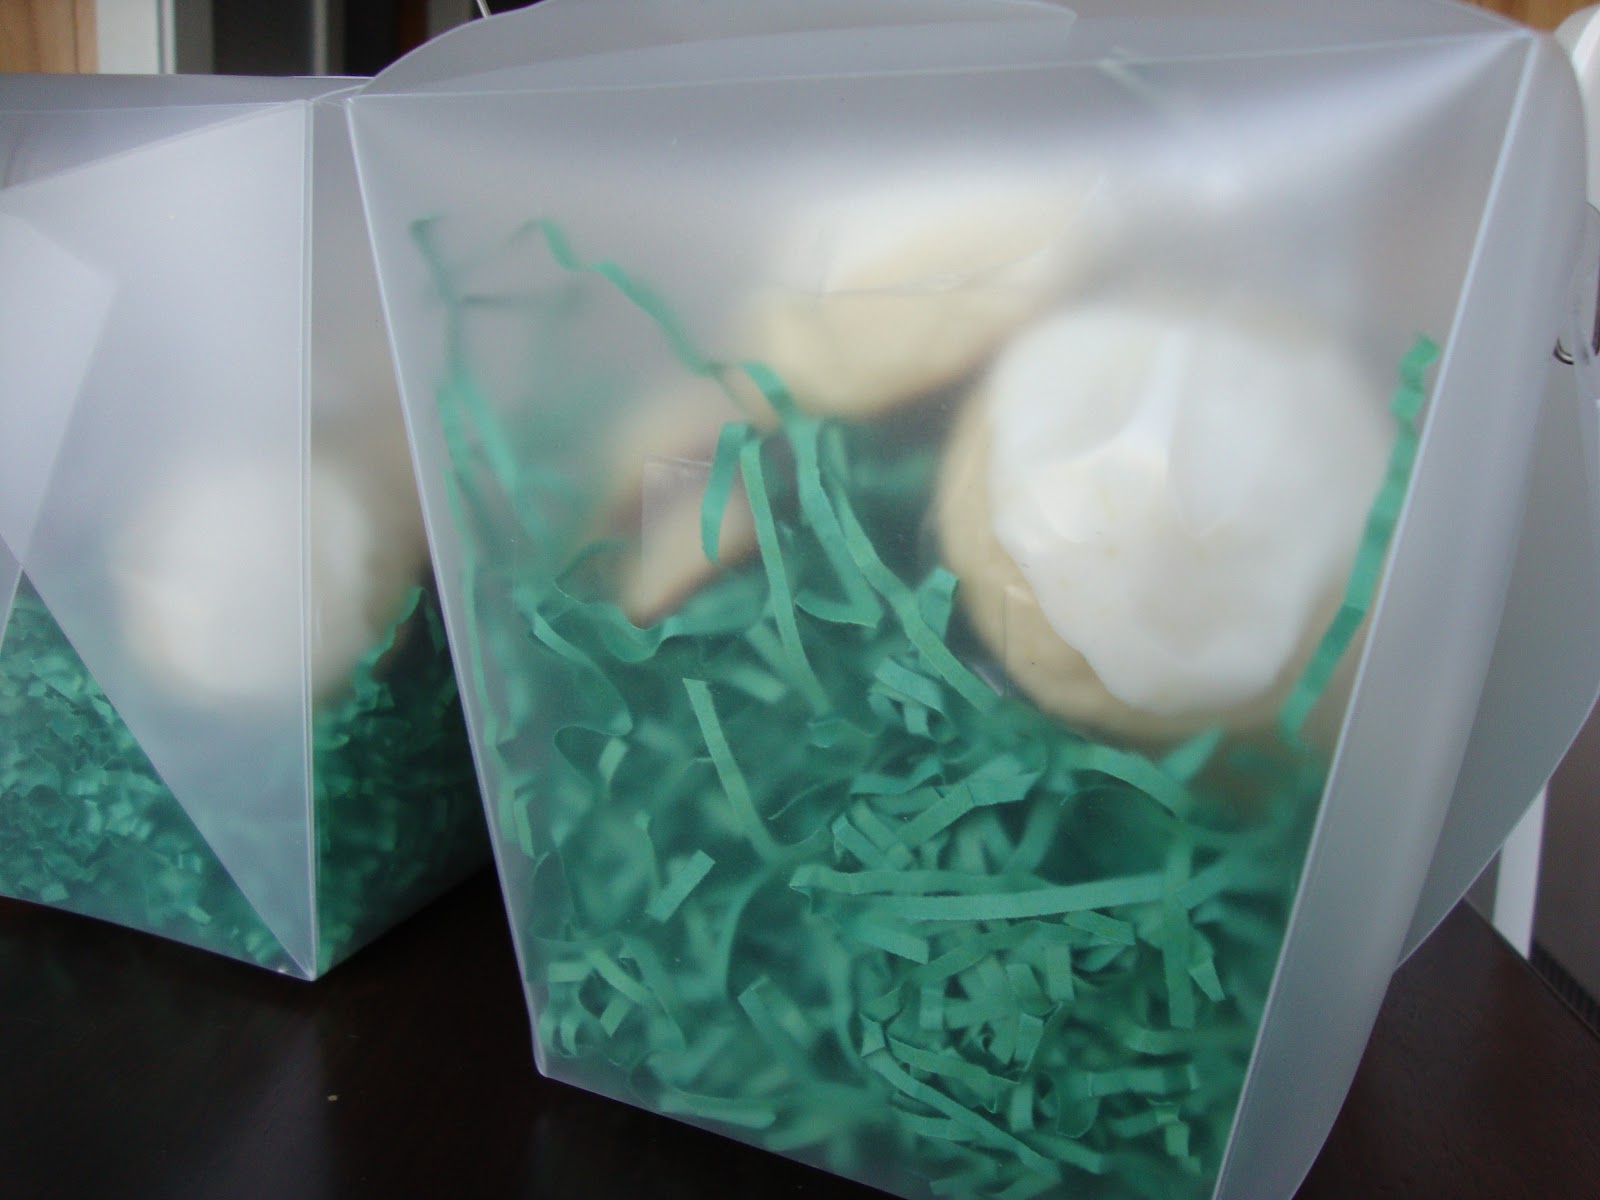
Remove cupcakes from the muffin tin. Fit a pastry bag with a 1/2-inch star tip and fill the bag with the frosting, then pipe the frosting onto the cupcakes. Or, spread the frosting on the cupcakes with an icing spatula.

The cupcakes can be stored in an air-tight container in the refrigerator for up to 3 days. It is best served a littel cooler than room temperature, so remove it from the refrigerator about 2 hours before serving.

Makes 12 perfectly yummy and delicious cupcakes! 

Monday, October 24, 2011

Little Food Thoughts

And back to Monday....I'm already planning the events of next weekend, which include fun trail walks with the pup and some new dishes to enjoy with my partner-in-crime. How cute is the pup sleeping while standing (Sorry I couldn't stop myself from posting this)???
 
However this past weekend was a mixed bag of great and....well, let's say not so great. On the food side there were some frustrations. I'm used to living in a location where I have access to a variety of ingredients from various sources and don't have to think twice about finding a cut of meat, a specific herb or even your standard fresh vegetables. I've learned that where we now live I have to revamp my strategy and seek out what I need instead of assuming it will always be readily available. So I've made the decision to sign us up for South Shore Organics, where we can get fresh, local fruits and veggies delivered to our house each week.
This puts a smile on my face - big plus for the weekend!

On another note, I've determined that milk tastes better out of a glass jar. But not any glass jar, one that comes straight from a farm. For someone who doesn't drink a lot of milk I've found that the taste of fresh milk is a whole new world from the standard carton drink.
If anyone knows a good farm that delivers fresh milk - I'm all ears

And lastly - I've decided I won't give up on finding the perfect cappuccino. It may come down to purchasing our own machine and learning, but I won't give up. I can't, I miss these perfect little cups of bliss from Italy.
Happy Monday - how was your weekend - filled with food stories?

Saturday, October 22, 2011

We Love You, Butternut

Mac & cheese is a classic comfort food favorite in it's original form. And of course you can add some fun things to spice it up, but I've found that any "lighter" version is bland and most recipes don't warrant even being tried...

That was until I stumbled across an amazing recipe from Cooking Light - I was still skeptical but thought I'd give it a try. And boy am I glad I did. This butternut squash mac & cheese is light yet flavorful and places our orange fall friend as the highlight of the dish without omitting the cheesy creamy taste you want from classic mac & cheese.

And even if you still don't believe me, I tested this recipe twice on some very picky mac & cheese lovers and they've requested it again. So very happy that we can enjoy falls favorites, combine them with classic comfort food and healthfully enjoy.

My New Favorite Mac & Cheese - (thank you Cooking Light!)

Ingredients

3 cups cubed peeled butternut squash (about 1 [1-pound] squash)
1 1/4 cups
fat-free, lower-sodium chicken broth
1 1/2 cups
fat-free milk
2 garlic cloves

1 teaspoon
kosher salt
1/2 teaspoon
freshly ground black pepper
2 tablespoons
fat-free Greek yogurt
1 1/4 cups
(5 ounces) shredded Gruyère cheese
1 cup
(4 ounces) grated pecorino Romano cheese
1/4 cup
(1 ounce) finely grated fresh Parmigiano-Reggiano cheese, divided
1 pound
uncooked cavatappi
Cooking spray

1 teaspoon
olive oil
1/2 cup
panko (Japanese breadcrumbs)
2 tablespoons
chopped fresh parsley

Preparation

1. Preheat oven to 375°.
2. Combine squash, broth, milk, and garlic in a medium saucepan; bring to a boil over medium-high heat. Reduce heat to medium, and simmer until squash is tender when pierced with a fork, about 25 minutes. Remove from heat.
3. Place the hot squash mixture in a blender. Add salt, pepper, and Greek yogurt. Remove the center piece of blender lid (to allow steam to escape); secure blender lid on blender. Place a clean towel over opening in blender lid (to avoid splatters). Blend until smooth. Place blended squash mixture in a bowl; stir in Gruyère, pecorino Romano, and 2 tablespoons Parmigiano-Reggiano. Stir until combined.
4. Cook pasta according to package directions, omitting salt and fat; drain well. Add pasta to squash mixture, and stir until combined. Spread mixture evenly into a 13 x 9-inch glass or ceramic baking dish coated with cooking spray.
5. Heat oil in a medium skillet over medium heat. Add panko, and cook for 2 minutes or until golden brown. Remove from heat; stir in remaining 2 tablespoons Parmigiano-Reggiano cheese. Sprinkle evenly over the hot pasta mixture. Lightly coat topping with cooking spray.
6. Bake at 375° for 25 minutes or until bubbly. Sprinkle with parsley, and serve immediately.

Tuesday, October 18, 2011

Oystering the Weekend Away

It's the end of a season folks - oyster season that is. As many of you know one of my absolute favorite foods is oysters. I've told many a friends that if I had to pick a "last meal" it would be oysters and champagne, it seems like heaven just thinking about it.

Well to say goodbye to oyster season here on the east coast my partner-in-crime and I went to the Wellfleet Oyster Festival this weekend. It was pretty much my personal heaven. I think I smiled the entire weekend, ate oysters before 11am and never thought twice about it.

Some of he highlights included oysters with sour cream and caviar....
These are definitely extravagant little treats!

And grilled oysters - something new to me but the garlic flavor was to die for


But the oysters I ate the most were those deliciously, fresh Wellfleets with a splash of lemon


This is one happy food blogger. I'll miss you oyster season, but I'm counting down the days to your return.

Monday, October 10, 2011

Make Some Memories

I started this blog to talk not only about food and recipes and restaurants but to connect each of these with a memory, a person and a smile. This past week we lost a digital icon, Steve Jobs, who redefined the way we use technology and also the way we look at our lives. It's people like this that make a true impact not only on the world but on many individuals.

This past weekend my family lost a dear member who lived life every day. I don't think he ever just went through the motions but rather enjoyed all the moments of each day. He was the life of the party who I remember for always drinking great wine, enjoying every family get together and dancing the night away. Age didn't matter to him, but memories did. It's people like this that remind us to enjoy each day, drink the night away and make a memory out of everything.

Wednesday, September 21, 2011

There's Nothing in the Fridge...

On purpose! A couple of weeks ago with the loss of power for a couple of days our entire fridge and freezer had to be emptied. This not only forced me to clean every inch of the appliance but also got us thinking that we're throwing out too much food on a weekly basis. Vegetables that were meant for a stirfry, meat that didn't get grilled and condiments that really weren't a necessity. Life was getting ahead of us and we decided to slow down and really only buy what we need and use what we buy. That means dinners at home all week, lots of prep on the weekends and a list to organize it all - oh I love lists (actually I love crossing off items even more!)

It's been about 3 weeks and I can actually name all the items in both the fridge and freezer. There's lots of white space, and I love that. We're becoming more creative with what we have and wasting less. This challenge was prompted by a power loss and then fostered by September being Hunger Action Month. So take a step back, learn a little more and appreciate your next bite, whatever it might be.


Monday, September 5, 2011

A Cupcake is Just a Cupcake?

Not all cupcakes are created equal - trust me. This comes from a very picky cupcake eater that mostly forgoes any cake because I assume it will be too buttery, too sugary and just too dense. However, this doesn't mean I don't try those that people "claim" are the best and test out recipe after recipe for friends' birthdays. Which is exactly how I found cupcake heaven.

There's a little secret with this recipe that I will save until the end because if I start with that news I know most of you won't try this recipe. But trust me if you're a chocolate lover and are looking for a moist airy and delicious cupcake this one is the best I've found. I know it's good when the birthday girl calls the next day to say she's craving one for breakfast.

I can't argue, who could resist one of these beauties???

And now the secret - these happen to be lovely little vegan cupcakes, however they are spot on for any chocolate lover. The frosting uses tofu, which I was skeptical about at first, but it's actually the perfect answer to fluffy, chocolaty frosting that isn't too sweet. Thanks to "Beantown Baker" for first posting!

Chocolate Cupcakes & Mousse Frosting - from Vegan Cupcakes Take Over the World
1 cup soy milk
1 tsp apple cider vinegar
3/4 cup granulated sugar
1/3 cup canola oil
1 tsp vanilla extract
1/2 tsp almond extract
1 cup all-purpose flour
1/3 cup cocoa
3/4 tsp baking soda
1/2 tsp baking powder
1/4 tsp salt

  1. Preheat oven to 350 and line muffin pan with cupcake liners.
  2.  Whisk the soy milk and vinegar in a large bowl and set aside a few minutes to get good and curdled.
    Add the sugar, oil, vanilla, and almond extract to the soy milk mixture and beat until foamy.
    In a separate bowl, sift the flour, cocoa, baking powder, baking soda, and salt. Add in two batches to wet ingredients and beat till no large lumps remain. 
  3. Pour into liners, filling three-quarters of the way.
  4.  Bake 18-20 minutes until a toothpick inserted into the center comes out clean.
Chocolate mousse
1 (12.3 oz) pkg extra-firm tofu, drained
1/4 cup plain soy milk
2 Tbsp agave syrup or pure maple syrup
1 tsp vanilla extract
1 (12 oz) pkg semisweet chocolate chips
1 very ripe banana

  1. Crumble tofu into blender. Add milk, agave, and vanilla. Puree until smooth.
  2. Melt chocolate in double boiler. Allow to cool 5 minutes, stirring occasionally.
  3. Add the chocolate to the blender and blend until combined. Be sure to scrape down the sides a couple times.
  4. Transfer mousse to airtight container or a bowl covered with plastic wrap. Chill for an hour (or longer).


I think the end product is so pretty - let's take one last look....ahh beautiful.

Thursday, September 1, 2011

What's In Your Brown Bag Today

It's September 1st (boo to the cooler weather) and the start of our brown bag challenge (yeah!). I've been looking for a way, a reason, a hope to get back on my love of bringing homemade lunch. Sure we'll have some days of eating oatmeal, but I'm excited for the the extra push to get back to my creative lunch-making roots!


As many of you know and probably also experienced we've had a loss of power here in good ol' MA. This has meant for a lot of creative thinking this week and an extra challenge to start my brown-bagging escapade. No worries though I made a trip to Trader Joe's early this week and was able to keep some grocery essentials here in the work fridge.

So today is the start and I'm leading with a classic salad turned up - adding chive and lemon hummus, toasted almonds, cranberries and a little couscous on top. YUM - can't wait! Although September may have snuck up on you all, don't sweat it, just jump into the challenge with us tomorrow.


Here's to brown bag - although I think this weekend I'll treat myself to a more stylish lunch carrier!


Monday, August 22, 2011

For the Love of Food - a Guest Blog Post!

I recently had the opportunity to write a guest blog post for the Culinary Guild of New England, which was an absolute fun and exciting experience. It forced me to test and retest my recipes (never been good at that measurement thing) and also narrow down my passions. The result - Pasta Wednesday, Brought to Life - quick go read it!


Even more exciting was to have the honor to write for the Culinary Guild of New England, which supports and educates all aspects of the culinary world. There's nothing better in my mind! The Guild (which anyone can join) is holding it's opening meeting on September 19th - and trust me, this is just the start of fabulous food events they'll host all year. So enjoy a night out with some great foodies and see what it's all about  - oh and I'll be there of course!

Friday, August 19, 2011

Reinventing the Brown Bag Lunch

My mom used to pack our lunch in elementary school - it was turkey sandwich, grapes, salt-free pretzels and a granola bar. It may sound boring, but to us it was just our normal mom food that was perfect for a mid-day meal. I look back on these lunches and think how lucky we were to have a healthy mom who never bought white bread, didn't use much mayo and really packed a wholesome healthy meal - thanks Mom!

Fast forward about 20 years and things have gotten so crazy that this past month has been a lot of pick-up lunch time meals (if I have time to run out!). I actually love - and used to be known for - bringing my lunch so I'm taking the challenge - the Brown Bag Challenge.

Every weekday in September I pledge to bring my lunch (minus those days I"m traveling, that gets tough!) in hopes of eating a bit healthier, saving a little cash and getting back to what my Mom taught me. Lucky for you I'll share some great lunch time ideas along the way. There may be some days when I'll pack a good old school day lunch, but I"m hoping to give you some new and tasty ideas along the way.
So who's with me???

Sunday, August 14, 2011

Two Weeks of Restaurants

It's back again folks - Restaurant Week Boston Summer 2011 - one of the best deals in town, that really is larger than the city itself. I remember about 5 years ago the list of restaurants only scrolled on one page, the celebration was only one-week long and not many people were talking about this event.

Oh how times have changed - and for the better! For 2 scheduled weeks (Sun-Fri) you can get a 2-course lunch for $15.11, a 3-course lunch for $20.11 or a 3-course dinner for $33.11. The best part is the choice of venues has grown extensively, so much so that it now spans north, south and west of the city. This is the time to try some of those overly delicate dishes that you've been saving for a special occasion. Although the menus are a fixed selection I've always felt all of the choices are the best showcase for each restaurant.

So grab some friends, schedule a date or just go it alone. My only reminder - please, pleas,e please tip the staff as if it were a regular-priced meal - they deserve it!
Happy Eating!

Thursday, August 11, 2011

Happy Drink

This week has been very long and I'm a bit tired. Sometimes with a lack of sleep I feel my personality draining, and there might have been a point where I whined last night. But today is a new day and although still a bit sleepy I think a Happy Cup might just do the trick. Sometimes it's less about what's in the cup, on dish or cooking in the pan, but more about the pretty little accessories that get you there. And today I vow to drink out of a happy cup!
I think I'll purchase


Saturday, August 6, 2011

Vegan Style Delicious

I love when people come into your life and it feels like you've known them forever. I also like that this certain someone provides me with a new cooking challenge -tasty vegan dishes that satisfy appetites of any entire crowd (vegans or not).

So I took the traditional pasta salad (which is never exciting) and created a dish that provided that same balance in a whole new light. A little Roasted Veggie Wheatberry Salad with Champagne Vinaigrette - who said vegan wasn't delicious??? Just to clarify from the start, wheatberry is not a fruit but a vegan friendly grain that is strong like pasta, shaped a little like barley and nutty like couscous, oh and utterly delicious.

Recipe

Prepare wheatberry according to the package and set aside

Cut any veggies you have on hand and toss with olive oil, salt and pepper on a baking sheet. Roast at 425 until they become slightly charred, about 25 minutes


Dressing: Whisk together lemon, GOOD olive oil, salt pepper, champagne vinegar and 1 chopped garlic clove. I added some fresh basil to the dressing at the end too!


Mix the veggies with the wheatberry and add the dressing - taste along the way to make sure you don't  add too much dressing at once.

And the result - satisfying, healthy, vegan delicious dish - challenged conquered!

Wednesday, August 3, 2011

Making Fresh Work

I'm overly obsessed with the idea of fresh - those farm dinners you see popping up all over and restaurants that change their menus daily to accommodate what's just been picked that morning. However, I also understand the amount of time, money and planning it takes to pull off fresh day after day and night after night. So I applaud any restaurant that can incorporate even a little bit of this fresh idea and make it work.

Scarlet Oak Tavern in Hingham is one of my favs and flew to the top of the list when a) I realized they had outdoor seating, b) that outdoor seating is surrounded by their herb and vegetable garden and c) each week they produce a special "farm 2 fork" menu (which includes dessert!).

One of last weekend's "farm 2 fork" creations
I love how Scarlet Oak took the concept of fresh and not only made it their own but made it work for them. They grow what they can, work with local farmers and produce a mouthwatering taste of fresh. The food is within concept, believable to customers and utterly delicious!

Thursday, July 28, 2011

It's Oyster Time

It's that time of year - the time when I crave oysters and champagne every beautiful night. The time of year when I prep myself to try each and every one and savor the tastes of summer. And don't you worry I had some delicious Duxbury Island Creek oysters last night and they were as good as I remembered (from last week!).
http://www.islandcreekfoundation.org/festival
This also means its time to prep for September (I know you don't want to hear that word), but this little gathering will make it easier to bear. The annual Island Creek Oyster Festival is back at it and tickets are on sale for the oyster party on the beach. Although the party is September 10, 3-11pm, I suggest you buy your tickets now to secure a spot in the sand and a planned activity once that "S" month hits.

Big Tip: Arrive close to the start and you'll be able to enjoy free samples of some of the best food from local chefs and restaurants in the area

Happy Oystering!